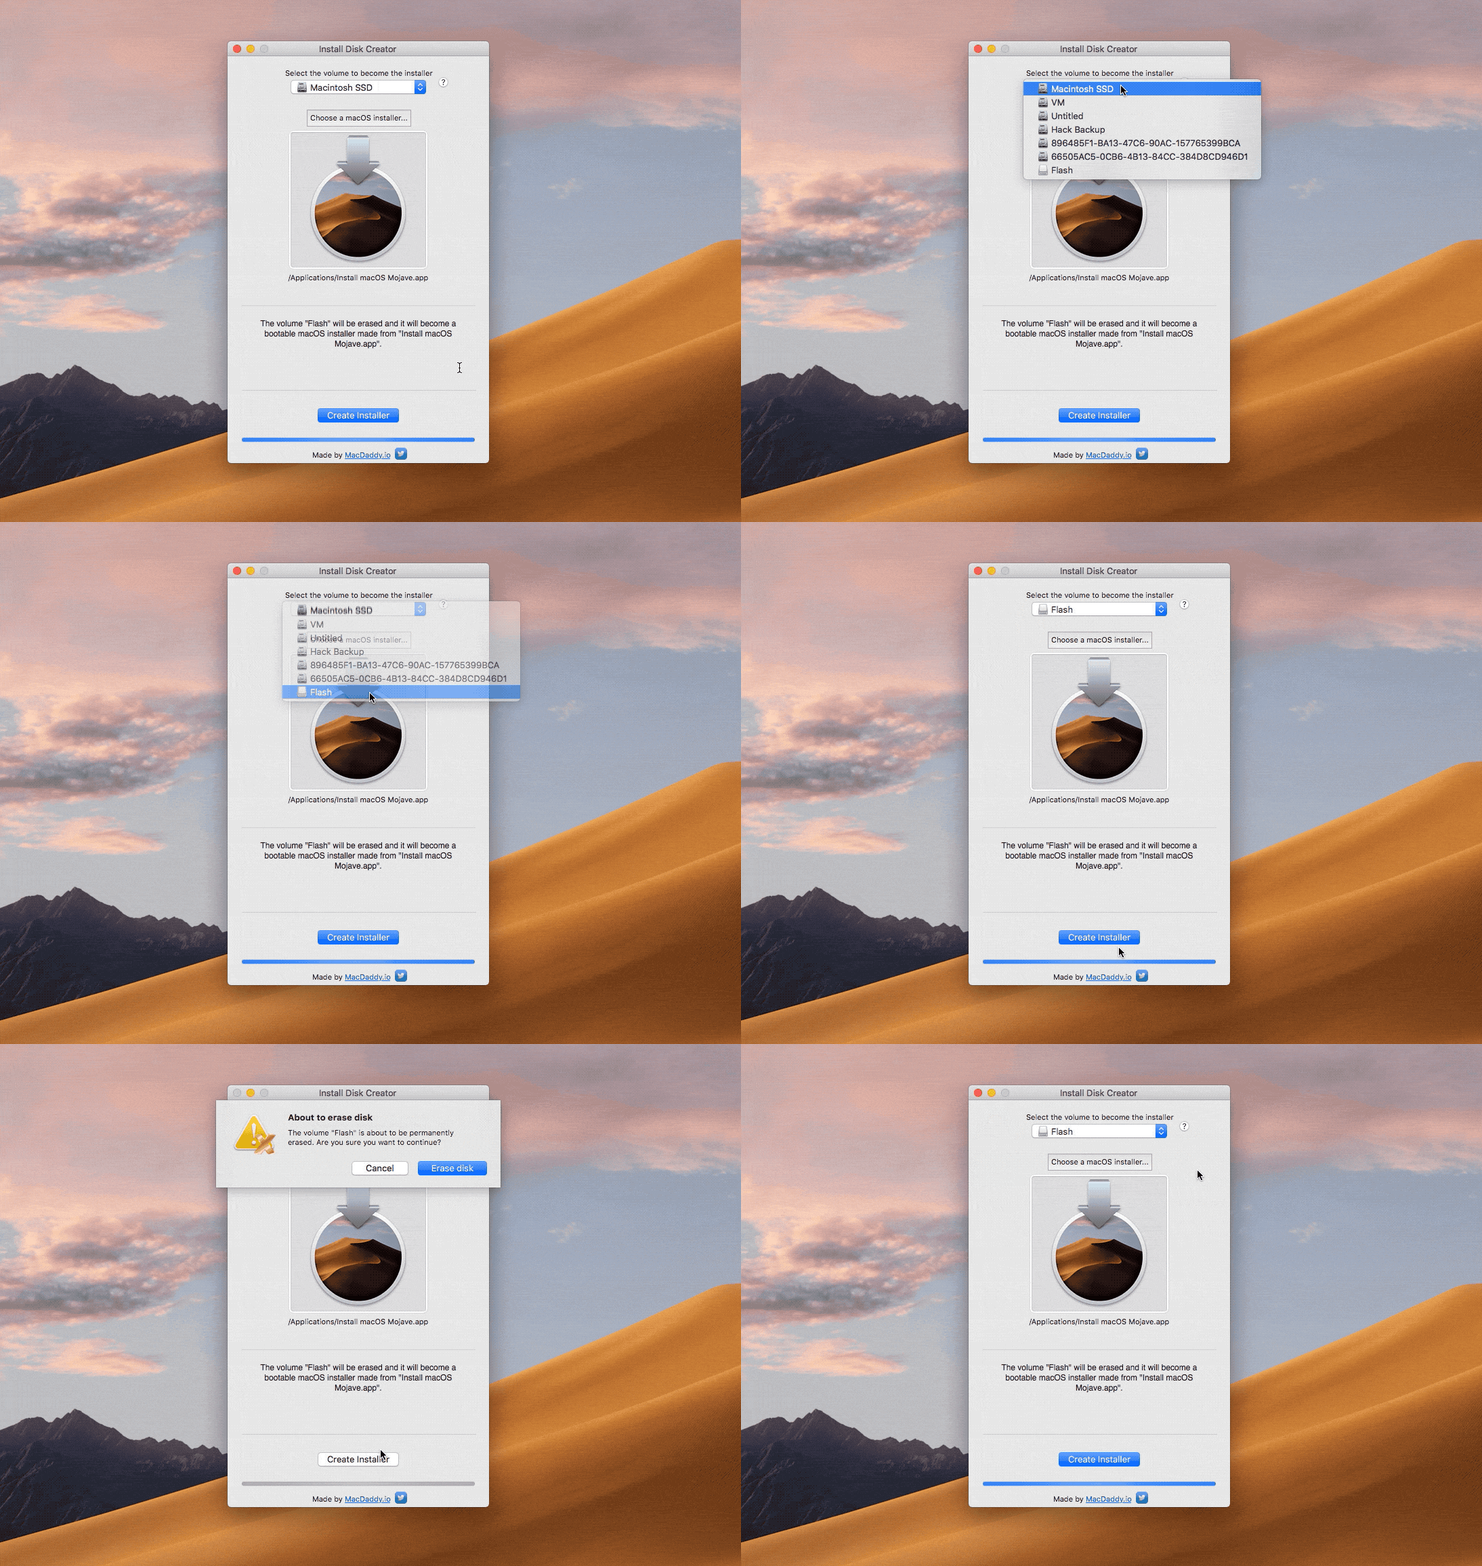
Hướng dẫn cài đặt Game Porting Toolkit trên Mac Apple Silicon để chơi Diablo IV...
Bạn đã có thể chơi được Diablo IV, Death Stranding, Elden Ring ... và nhiều game Windows khác trên máy Mac Apple Silicon với Game Porting Toolkit.
Ngoài ra bạn cũng có thể tham khảo Crossover 23 để chơi game Diablo IV dễ dàng hơn trên Mac:
Để có thể cài đặt Game Porting Toolkit bạn cần phải chạy macOS Ventura 13.4 hoặc macOS Sonoma beta 1. Bên cạnh đó máy mac của bạn phải sử dụng chip Apple Silicon (M1, M2..)
Bạn hãy làm theo từng bước để có thể cài đặt và chơi được game nhé.
- Cài đặt Xcode từ App store và mở Xcode (bạn cũng có thể tải Xcode 15 Beta từ link bên dưới)
Sau đó bạn có thể chạy dòng lệnh:
sudo xcode-select -s /Applications/Xcode.app/Contents/Developer
- Tải và cài đặt Command Line Tools cho Xcode 15 Beta từ: https://developer.apple.com/download/all/
Sau khi cài đặt Command Line Tools bạn mở Terminal và nhập dòng lệnh sau để kiểm tra: xcode-select -p
Trên Terminal sẽ hiển thị
/Applications/Xcode-beta.app/Contents/Developer
Nếu bạn thấy Terminal hiển thị Xcode.app thay vì of Xcode-beta.app
Bạn có thể kệ hoặc gõ thêm dòng lệnh: xcode-select -s /Applications/Xcode-beta.app/Contents/Developer
- Cài đặt Rosetta
Nhập lệnh: softwareupdate --install-rosetta
- Cài đặt Game Porting Toolkit
Tải và cài đặt Game Porting Toolkit từ: https://developer.apple.com/download/all
Chuyển cấu trúc sang Intel
Nhập dòng lệnh: arch -x86_64 zsh
- Cài đặt homebrew
Nếu trước đây bạn đã cài đặt homebrew rồi thì bạn vẫn cần cài đặt lại thêm cho Intel:
Nhập lệnh: /bin/bash -c "$(curl -fsSL https://raw.githubusercontent.com/Homebrew/install/HEAD/install.sh)"
Thay đổi địa chỉ của Homebrew: export PATH="/usr/local/bin:${PATH}"
Sau đó nhập lệnh: brew doctor
Có thể bạn sẽ cần phải đợi 1 lát để brew cập nhật
Sau đó bạn cần nhập thêm: sudo chown -R $(whoami) /usr/local/share/zsh /usr/local/share/zsh/site-functions
Cài đặt game-porting-toolkit
Nhập lệnh: brew tap apple/apple http://github.com/apple/homebrew-apple
Tiến hành cài đặt: brew -v install apple/apple/game-porting-toolkit
Quá trình cài đặt game-porting-toolkit sẽ khá là lâu, nhớ đảm bảo mạng của bạn ổn định trong quá trình cài đặt nhé.
Cài đặt Diablo IV
Tạo thư mục Games để cài đặt Game
mkdir ~/Games
Tạo thư mục để cài đặt Battle Net
export WINEPREFIX=~/Games/battle-net
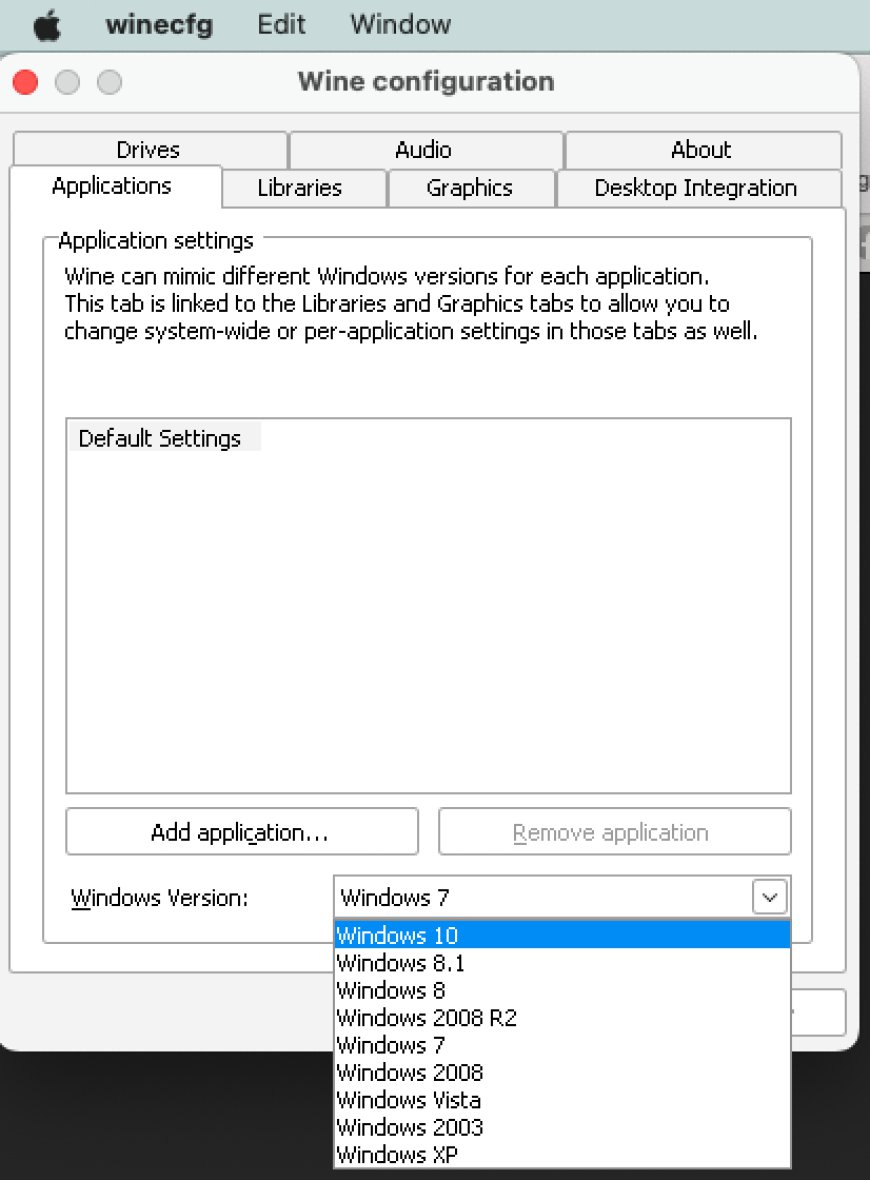
Thiết lập phiên bản Windows thành Windows 10 do Diablo IV và nhiều game khác chỉ chơi được trên Windows 10
`brew --prefix game-porting-toolkit`/bin/wine64 winecfg
Copy thư viện Game Porting Toolkit vào thư mục Wine
ditto /Volumes/Game\ Porting\ Toolkit-1.0/lib/ `brew --prefix game-porting-toolkit`/lib/
Tiếp tục nhập thêm lệnh
cp /Volumes/Game\ Porting\ Toolkit-1.0/gameportingtoolkit* /usr/local/bin
Bạn sẽ cần cập nhật cả phiên bản Windows 10 để hỗ trợ Battle Net
`brew --prefix game-porting-toolkit`/bin/wine64 reg add 'HKEY_LOCAL_MACHINE\Software\Microsoft\Windows NT\CurrentVersion' /v CurrentBuild /t REG_SZ /d 19042 /f
`brew --prefix game-porting-toolkit`/bin/wine64 reg add 'HKEY_LOCAL_MACHINE\Software\Microsoft\Windows NT\CurrentVersion' /v CurrentBuildNumber /t REG_SZ /d 19042 /f
`brew --prefix game-porting-toolkit`/bin/wineserver -k
- Tải và cài đặt Battle Net
Tải Battle Net dành cho Windows từ địa chỉ: https://www.blizzard.com/download/
Các game khác cũng vậy, bạn nhớ tải phiên bản Windows và lưu ở thư mục Downloads nhé.
Chạy lệnh để kiểm tra xem bộ cài đã có trong thư mục Downloads hay chưa: ls ~/Games/battle-net/drive_c/users/crossover/Downloads/
Cài đặt Battle net: gameportingtoolkit ~/Games/battle-net ~/Games/battle-net/drive_c/users/crossover/Downloads/Battle.net-Setup.exe
Nếu bạn muốn cài game khác hoặc Steam, Epic Game Launcher thì cũng làm tương tự. Bạn có thể đổi tên các bộ cài sao cho ngắn gọn hơn và thay Battle.net-Setup.exe bằng tên các game hoặc các chợ game khác.
Sau khi cài đặt xong Battle net bạn đã có thể cài đặt Diablo IV, Diablo 2 từ Battle Net.
- Chơi game
Để chơi game bạn có thể nhập lệnh vào Terminal: PATH="/usr/local/bin:${PATH}" arch -x86_64 /usr/local/bin/gameportingtoolkit-no-hud ~/Games/battle-net ~/Games/battle-net/drive_c/Program\ Files\ \(x86\)/Diablo\ IV/Diablo\ IV\ Launcher.exe
Nếu bạn cài game khác thì cần thay đường dẫn /Diablo\ IV/Diablo\ IV\ Launcher.exe thành tên của game tương ứng. Ví dụ như Steam/Steam.exe chẳng hạn
Để cho dễ dàng hơn, bạn có thể tạo một ứng dụng Automator và nhập lệnh sau :
#!/bin/zsh export PATH="/usr/local/bin:${PATH}" (arch -x86_64 /usr/local/bin/gameportingtoolkit-no-hud ~/Games/battle-net ~/Games/battle-net/drive_c/Program\ Files\ \(x86\)/Diablo\ IV/Diablo\ IV\ Launcher.exe) || true
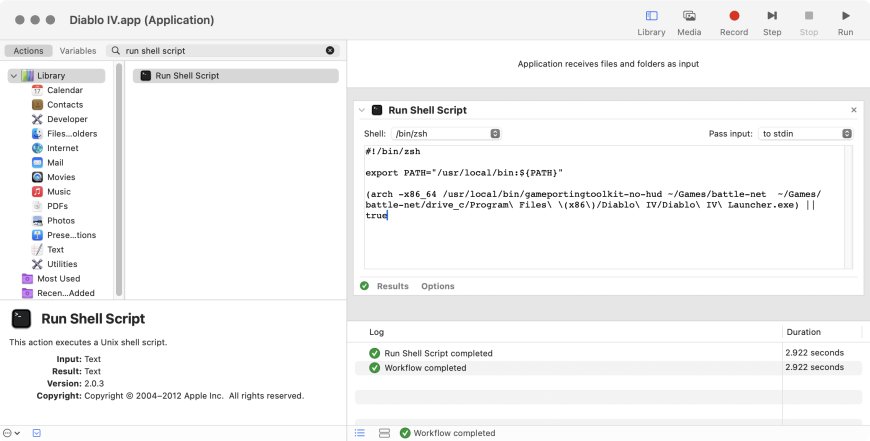
Tạo icon cho App này và giờ bạn đã có App Diablo IV để chơi rồi.
Chúc bạn thành công. Nếu có thắc mắc hay cần hỗ trợ cài đặt bạn có thể comment vào bài viết này để Macplanet hỗ trợ bạn cài đặt nhé.
Danh sách các game đã có thể chơi được trên Mac:
- AnimA: Reign of Darkness
- Astroneer
- Assassins Creed 3 Remastered
- Batman: Arkham Knight - launches with steam
- Bloodstained: Ritual of the Night
- Brick Rigs
- Genshin Impact 3.7 (m2max with 4k 60fps stable)
- Control (DX12 mode, if downloaded from Heroic, needs to be ran by Terminal)
- Crysis Remastered
- Cultic
- Cuphead
- Cyberpunk 2077
- Deep Rock Galactic
- Deceive Inc. - works well if launched without EAC
- Derail Valley (awesome performance, no missing manuals - in-game objects for train operation - like on CrossOver)
- Diablo IV [1]
- Dread Templar
- Dying Light 2 (needs AVX fix above)
- Dyson Sphere Program (some objects and main character weren't visible before)
- Elden Ring
- Final Fantasy VII Remake Intergrade (~50 FPS on High settings at 1080p with M1 Pro)
- Five Nights At Freddy's Security Breach
- Friends vs. Friends
- Gloomwood
- God of War (Works somewhat well on M1 Pro (16gb), wouldn't recommend lesser hardware.)
- Going Medieval
- Guilty Gear Strive
- Grand Theft Auto V
- Green Hell
- Halo 3 (MCC - No Online due to Easy Anti-Cheat Compatibility) [2]
- Halo Reach (MCC)
- HI-Fi RUSH
- Hogwarts Legacy - launches fine first time but then won't relaunch - can be fixed by deleting ~/my-game-prefix/drive_c/ProgramData/Hogwarts Legacy - these are the files that are created at first launch that prevent relaunching
- Hatsune Miku: Project DIVA Mega Mix+ - works with Retina mode; DivaModLoader and DivaNoSpy recommended; run Steam with WINEDEBUG=-all WINEESYNC=0 WINEDLLOVERRIDES="dinput8.dll=n,b"; may randomly crash at the title screen: use IntroPatch as a workaround
- Infinity Racer XD
- Kena: Bridge of Spirits
- Metal Gear Solid V: The Phantom Pain
- Outer Wilds (through steam)
- Overwatch 2
- QUBE 2
- People Playground
- Prodeus
- Ready or Not
- Risk of Rain 2 (does not require `-disable-gpu-skinning` like Crossover 22)
- Scarlet Nexus
- Sonic GT
- Sonic illusions
- Sonic Omens
- Sonic Project '06
- Spider-Man (2018)
- Spider-Man Miles Morales - requires Windows ver fix
- SpongeBob SquarePants: The Cosmic Shake
- StarCraft: Remastered - Game runs fine but opening Option menu the second time will cause game not recognizing any inputs.
- Tetris Effect: Connected - Game window likes to be uncooperative; really doesn't like retina mode, works otherwise
- V Rising
- Warframe - To get installer/launcher working add dwrite (disabled) to library overrides in winecfg
- WRATH: Aeon of Ruin
Bạn nghĩ sao ?
 thích
2
 Không thích
0
 Love
1
 Funny
0
 Angry
1
 Sad
0
Sad
0
 Wow
1
Wow
1
